
If you’re a beginner web designer who’s only ever worked in Windows or macOS, learning how to install Ubuntu Linux is a genuinely useful skill. Many web servers run Linux under the hood, so getting comfortable with Ubuntu on your own machine makes server environments, the command line, and hosting documentation far less intimidating later on.
Ubuntu is one of the most popular, beginner-friendly Linux distributions available, and installing it is more approachable than it looks. This guide walks through the entire process — downloading Ubuntu, creating a bootable USB drive, and completing the installation step by step — so you can get Ubuntu running on your computer with confidence.
Why Install Ubuntu Linux?
Ubuntu is free, open-source, and closely mirrors the environment many web hosting servers run on, which makes it a smart tool for a web designer to have on hand:
- Practice server environments locally before deploying anything live
- Get comfortable with the command line, which shows up constantly in hosting and deployment workflows
- Run it alongside your main OS in a virtual machine, without giving anything up
- It’s completely free, with no license fees or restrictions
Where Can You Download Ubuntu?
The first step is visiting the official Ubuntu website and downloading the ISO file — the disk image used to install the operating system. A few editions are available depending on your needs:
- Ubuntu Desktop — a full replacement operating system for a regular computer
- Ubuntu Server — built for file servers and enterprise use
- IoT Devices — a developer edition for Ubuntu Core
- Raspberry Pi — for single-board computer installations
- Other Flavors — Ubuntu variants with different desktop environments
For a first install, Ubuntu Desktop is the right choice.
Before You Install: Try Ubuntu First
One of Linux’s most beginner-friendly features is that you can try it before committing to anything. Ubuntu can run directly from a USB drive or DVD without touching your computer’s existing setup, so you can explore it risk-free.
You can also install Ubuntu inside a virtual machine using software like VirtualBox, letting you run Ubuntu and your main operating system side by side — a great option if you’re not ready to install it directly on your hardware.
How to Install Ubuntu Linux: Step-by-Step
1. Create a Bootable Ubuntu USB Drive
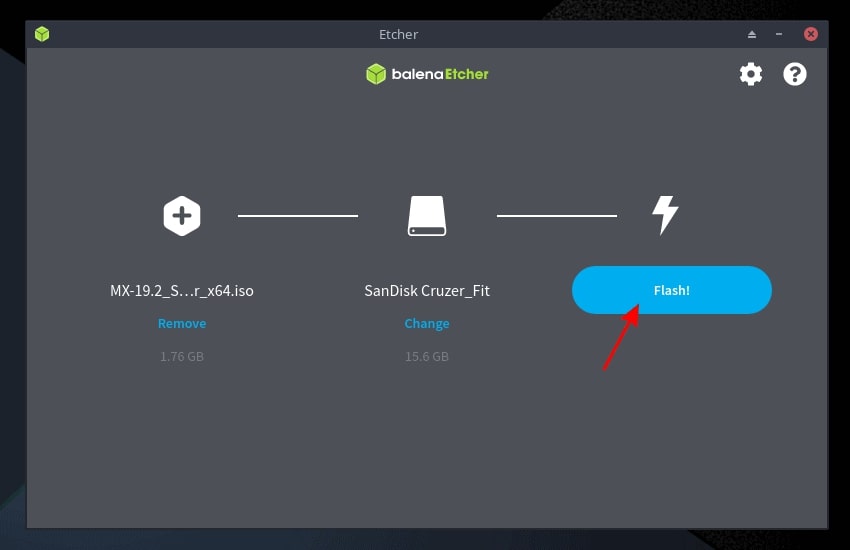
A bootable USB drive lets you install Ubuntu, upgrade an existing install, test the desktop experience, or access repair tools. After downloading the ISO file, use a tool like one of these to create your bootable drive:
- Etcher
- Rufus
- Unetbootin
- Pendrivelinux
The process is the same across most tools: select your blank USB drive, choose the downloaded ISO file, and click Create or Flash.
You need at least an 8 GB USB drive to install Ubuntu.
2. Boot From the Bootable USB Drive
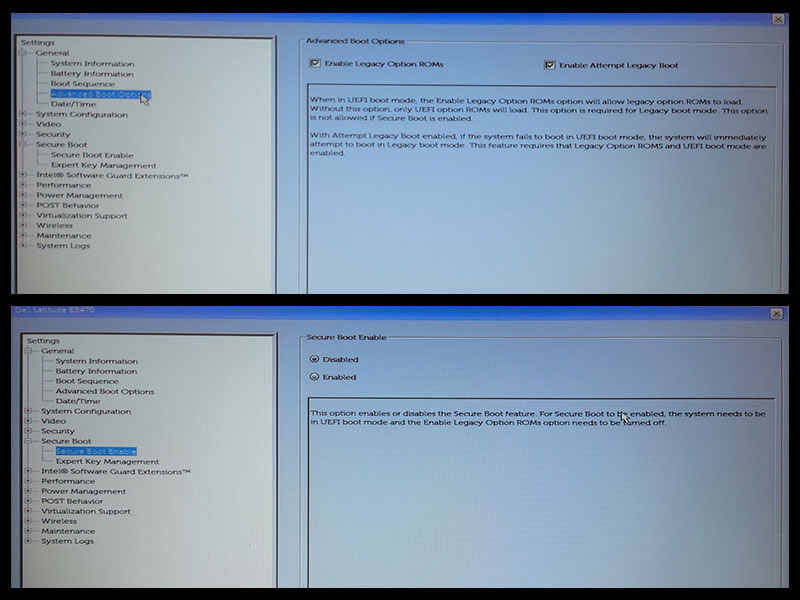
Boot procedures vary slightly by computer manufacturer. On a Dell computer, for example:
- Restart the computer.
- Insert the bootable USB drive.
- Press F2 when the Dell logo appears.
- Open Advanced Boot Options and enable Legacy Boot.
- Disable Secure Boot.
- Set the USB drive as the first boot option in the Boot Sequence.
- Save the settings and restart.
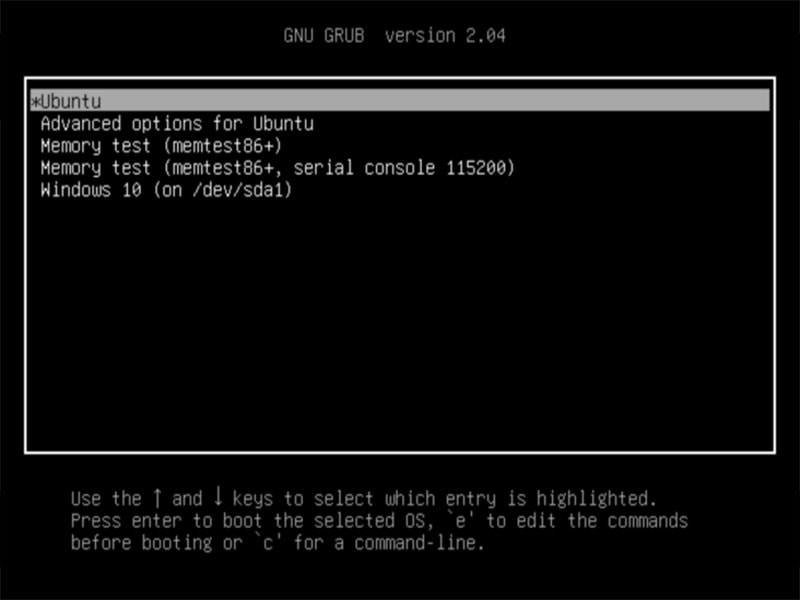
3. Start the Ubuntu Installer
The GRUB boot loader screen appears first. Select the Ubuntu option to begin a basic installation.
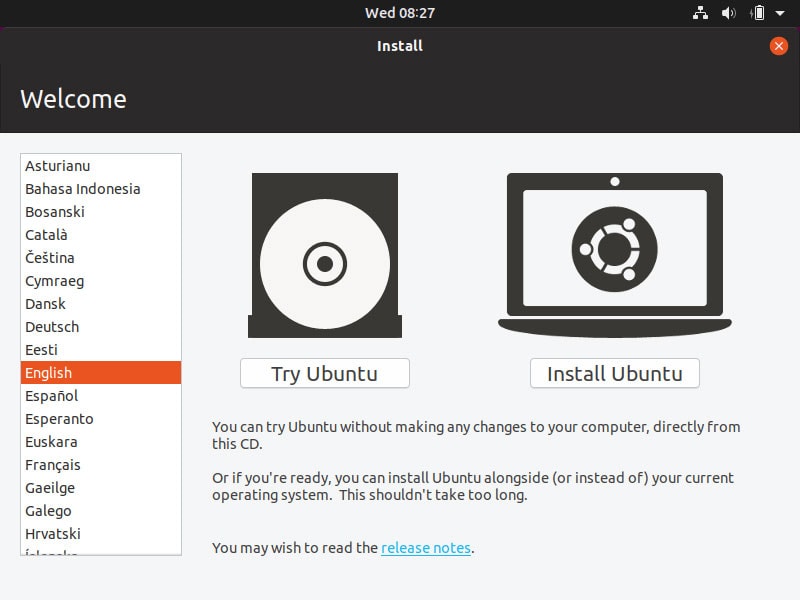
4. The Welcome Screen
Choose between “Try Ubuntu” or “Install Ubuntu,” and select your preferred language.
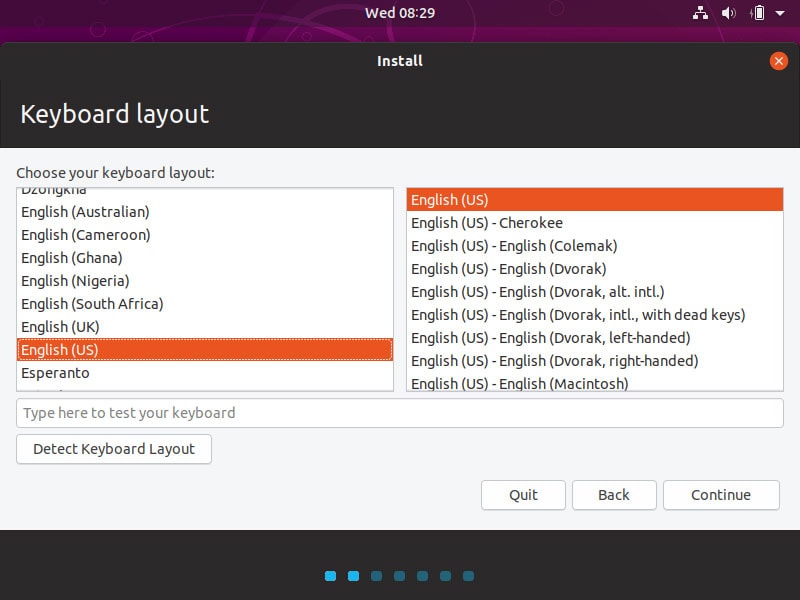
5. Choose Your Keyboard Layout
Select your preferred keyboard layout and click Continue.
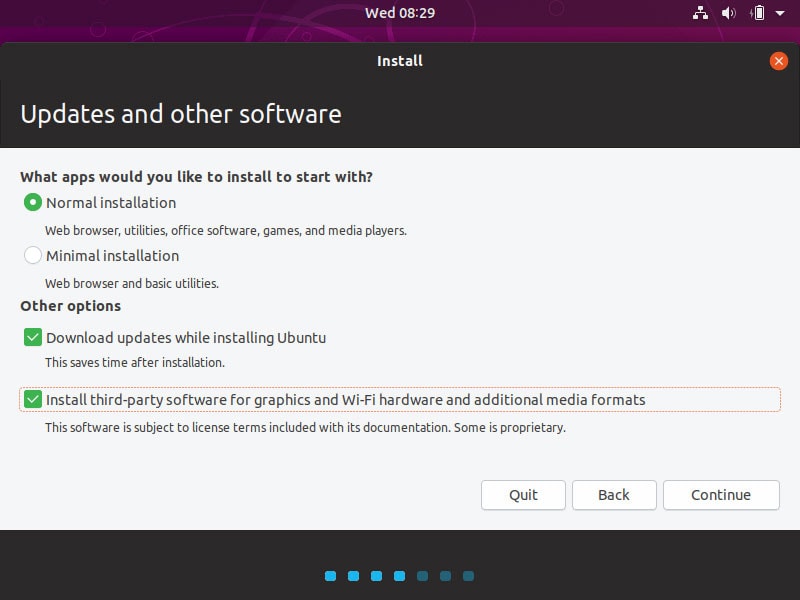
6. Updates and Other Software
Choose between a Normal installation (a complete setup with games, a browser, media players, and office software) or a Minimal installation (basic utilities and a web browser only — a good fit for older devices). It’s also worth checking both of these additional options:
- Download updates while installing Ubuntu
- Install third-party software for graphics, Wi-Fi, and media formats
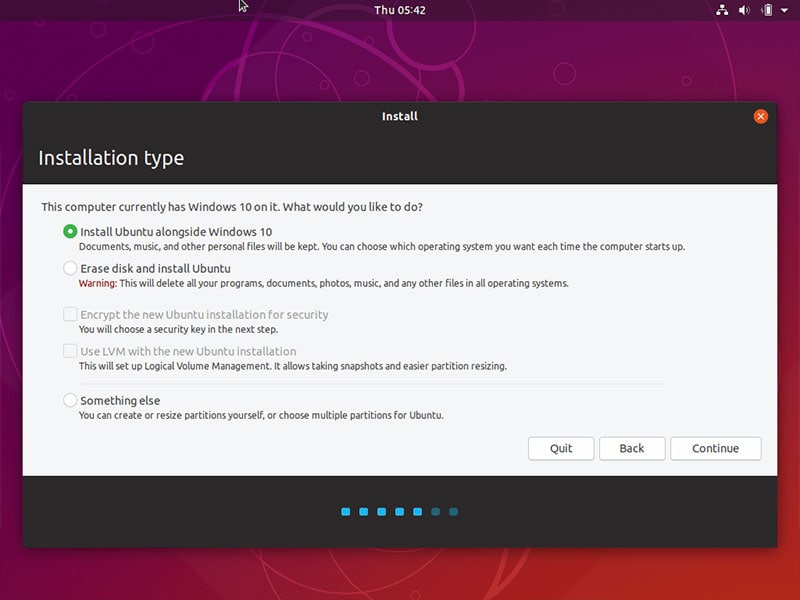
7. Choose Your Installation Type
You’ll be given three options for how Ubuntu gets installed:
- Install Ubuntu alongside Windows — keeps both operating systems and lets you choose between them from a GRUB menu at startup.
- Erase disk and install Ubuntu — removes all existing data and replaces it entirely with Ubuntu.
- Something else — lets you manually create or resize partitions for advanced setups.
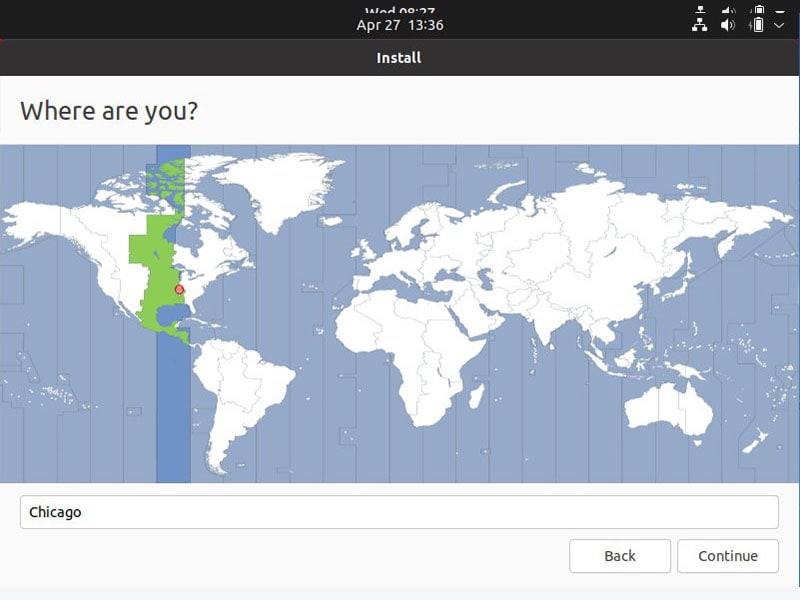
8. Select Your Location
Type your city name to set your time zone, then click Continue.
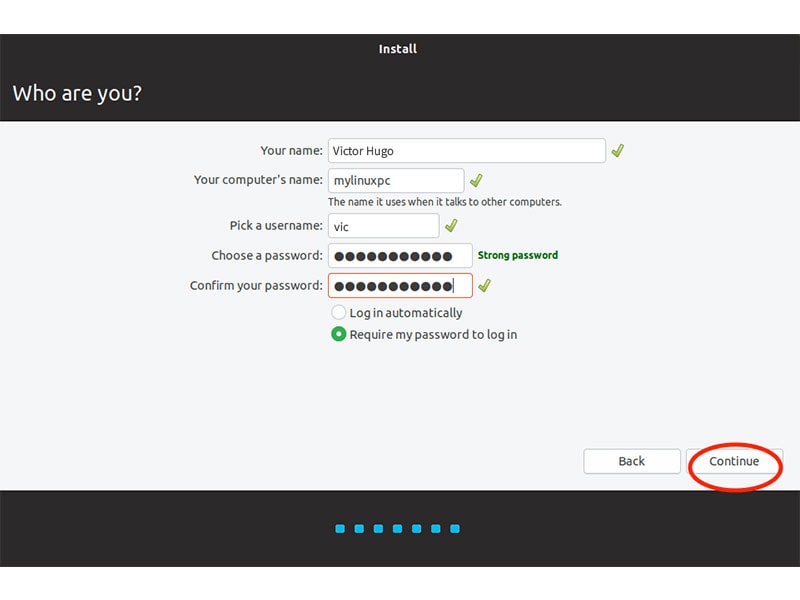
9. Set a Device Name and Password
Create your user account by entering:
- Your first and last name
- A computer or device name
- A login username
- A secure password and login options
What to Expect During Installation
The full installation process usually takes 15–30 minutes. Back up any important files before starting, especially if you’re erasing a disk. Most other Linux distributions follow a very similar installation process, so these steps will transfer well if you ever try a different flavor of Linux.
If you plan on sharing files across your network once Ubuntu is up and running, check out how to set up Samba on Ubuntu next.
Conclusion
Installing Ubuntu Linux is one of those tasks that looks more complicated than it actually is — download the ISO, create a bootable USB drive, boot from it, and work through a guided installer. Once you’ve done it once, the process becomes second nature, and you’ll have a genuinely useful skill for testing server environments and getting comfortable with the command line.
Whether you install Ubuntu directly on a spare machine, dual-boot it alongside Windows, or run it in a virtual machine, the step-by-step process covered here will get you a working Ubuntu install in under half an hour. For a beginner web designer, that’s time well spent — Linux fundamentals come up again and again the further you get into hosting, servers, and deployment.