
If you’re a beginner web designer working with WordPress, PHP, or any server-side website, you’ll eventually need a safe place to build and test before anything goes live. That’s exactly what learning how to install XAMPP gives you: a local web server running right on your own computer.
XAMPP is a free program that lets you set up a web server locally. Any website using a server-side language needs a web server to actually run, and XAMPP recreates that environment on your desktop — perfect for building and testing a site before uploading it to a live server.
This guide covers what XAMPP actually is, how to install and configure it on Windows step by step, and how to point it at your own project folder.
What Is XAMPP?
XAMPP bundles together the components most popular content management systems — like WordPress, Drupal, and Joomla — need to run: PHP, the Apache web server, and a MySQL database. It also installs phpMyAdmin, a popular browser-based tool for managing your databases.
Depending on your operating system, this free Apache distribution can also include extra tools like FileZilla, Mercury, Perl, and Tomcat. Together, these components let you build and test a fully working website on your own desktop, without uploading anything to a live server — because XAMPP contains the same core pieces most real web servers run on.
Why Web Designers Use XAMPP
For a beginner web designer, XAMPP solves a very practical problem: you need somewhere to safely test a WordPress theme, a plugin, or custom PHP code before touching a client’s live site. Instead of experimenting directly on a production server (and risking breaking something a client depends on), you build and test locally first, then upload only once everything works.
How to Install XAMPP on Windows
- Go to the Apache Friends website (apachefriends.org).
- Click “XAMPP for Windows” to download the installer.
- Open the downloaded
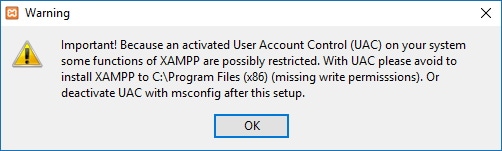
.exefile. - Click OK on the pop-up warning window.
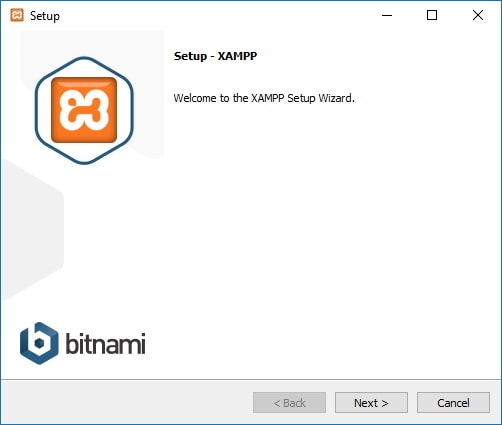
- Click Next on the setup wizard.
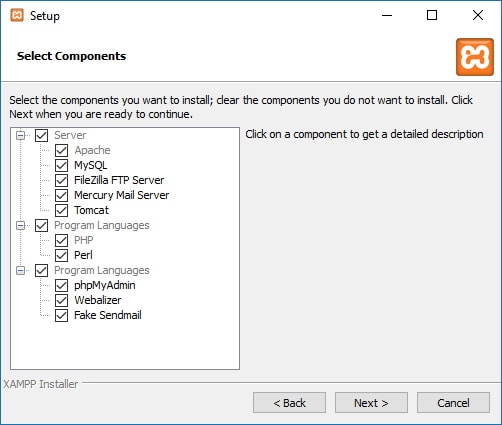
- Select the components you want to install.
- Click Next.
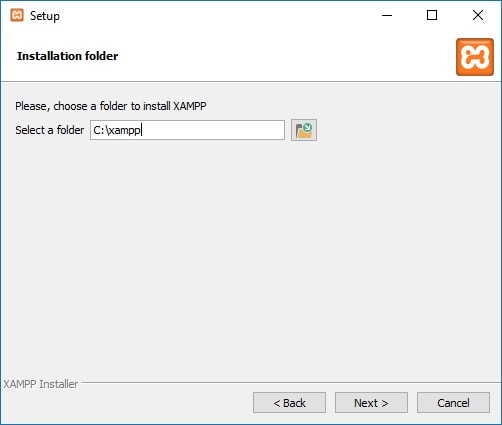
- Choose a folder to install XAMPP into.
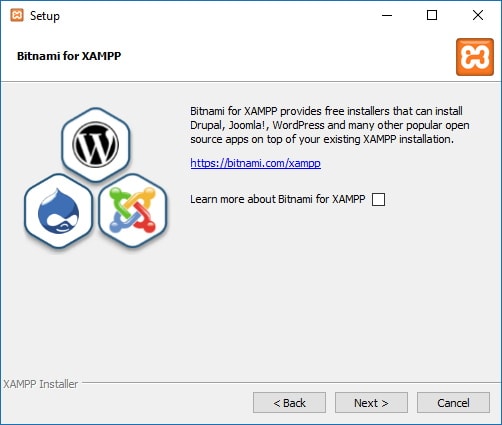
- Uncheck the “Learn more about Bitnami for XAMPP” option.
- Click Next.
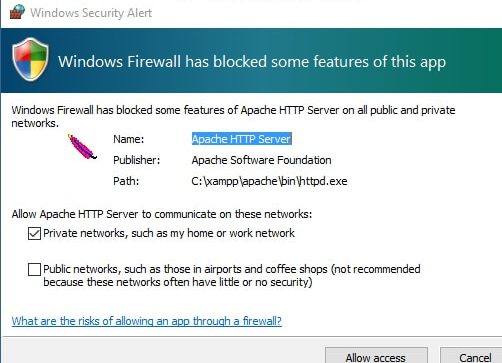
- If a Windows Security Alert appears, click “Allow Access.”
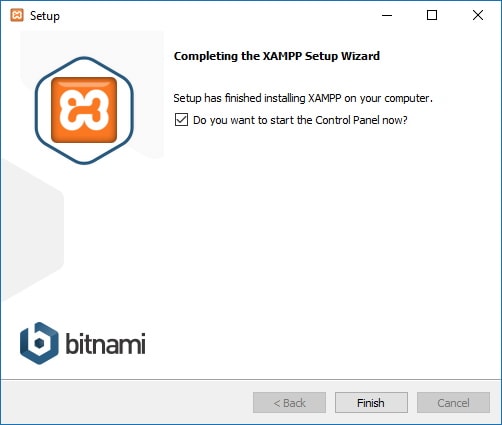
- Click Finish.
How to Configure XAMPP
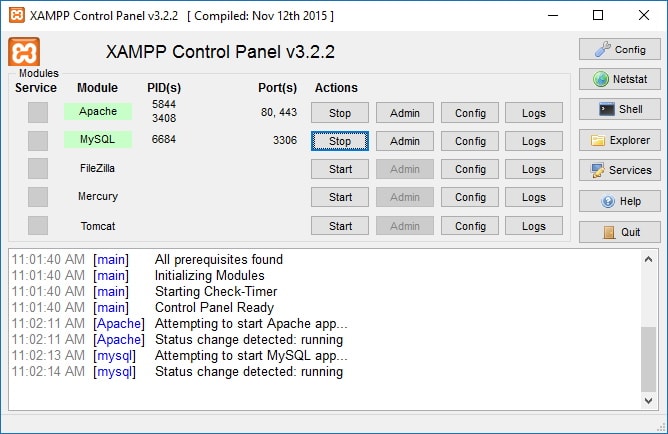
By default, XAMPP uses TCP/IP ports 80 and 443 for the web server, and port 3306 for MySQL.
To run your local server:
- Open the XAMPP Control Panel.
- Click Start next to Apache.
- Click Start next to MySQL.
Once both services are running:
- Click Admin in the Apache row to open your local website.
- Click Admin in the MySQL row to open phpMyAdmin.
How to Change Your Website’s Folder Location
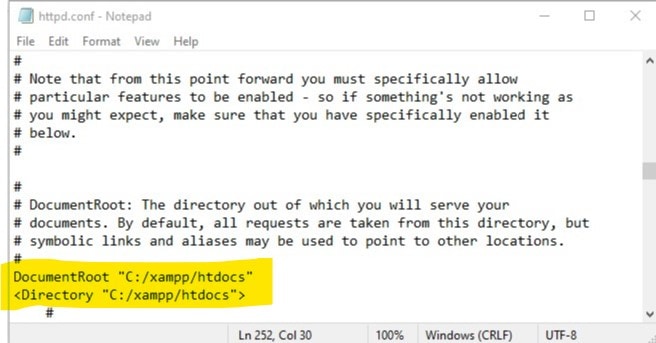
By default, XAMPP looks for your site files in its own install folder — but you’ll usually want to point it at your own project folder instead.
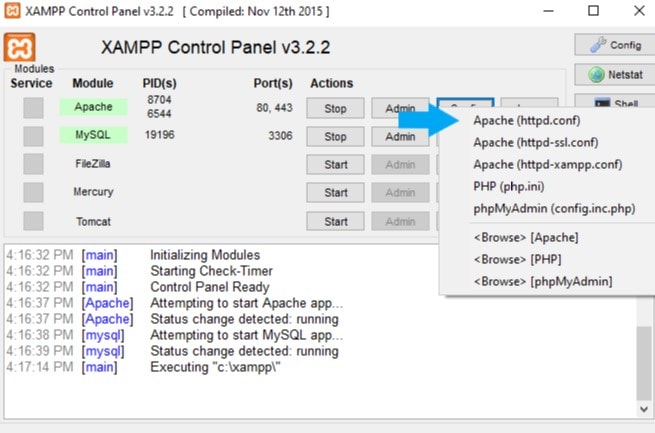
- Click Config in the Apache row of the control panel.
- Open the
httpd.conffile when it appears. - Replace the current folder path with the path to your project folder.
- Save and close the file.
- Restart the Apache and MySQL services.
XAMPP vs. Other Local Development Tools
XAMPP isn’t the only way to run a local development environment, so it’s worth knowing how it compares:
- XAMPP — free, cross-platform, and includes Apache, MySQL, PHP, and Perl by default. A great general-purpose choice for beginners.
- WAMP — Windows-only, similar to XAMPP but built specifically around the Windows/Apache/MySQL/PHP stack.
- MAMP — the macOS-focused equivalent, offering a similar bundled setup for Mac users.
- Local — a more modern, WordPress-specific tool with a friendlier interface, aimed at designers who only need a WordPress environment.
For general PHP development across any operating system, XAMPP remains one of the simplest, most widely documented options — which is exactly why it’s such a common starting point for beginners.
Troubleshooting Common XAMPP Issues
A few common snags come up when installing XAMPP for the first time:
- Apache won’t start. Another program (like Skype or IIS) may already be using port 80. Close it, or change XAMPP’s Apache port in its configuration.
- Windows Firewall blocks Apache or MySQL. Click “Allow Access” when prompted, so local traffic can reach your server.
- A blank page appears at localhost. Double-check that your project folder path in
httpd.confis correct and that Apache has been restarted.
Conclusion
Learning how to install XAMPP gives you a safe, local space to build and test PHP-based websites before anything touches a live server — a genuinely essential habit for any beginner web designer working with WordPress or custom PHP projects. Manually setting up a web server and PHP environment from scratch requires deep configuration knowledge, but XAMPP reduces all of that to running a single installer.
From downloading the installer to configuring Apache and MySQL and pointing XAMPP at your own project folder, the whole setup takes just a few minutes. Once it’s running, you have a fully functional local development environment ready for testing themes, plugins, and custom code — exactly like a real web server, minus the risk of breaking anything live.
Bookmark this guide the next time you set up a new machine or help a client get started with local development — between the installation steps, the configuration walkthrough, and the troubleshooting tips above, you’ll have everything you need to get XAMPP running smoothly from scratch.