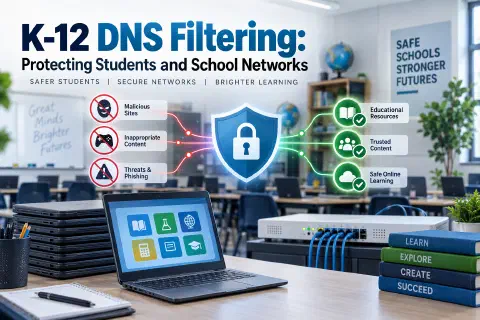
DNS filtering is a way for schools to block harmful or inappropriate websites by controlling the step where a device turns a website name into an address: when a student’s device asks for a blocked site, the filter refuses to answer, so the page never loads.
For a school, that single idea does a lot of work. It can stop malware and phishing sites, block adult or unsafe content, and help meet the content filtering expectations of the Children’s Internet Protection Act (CIPA), and it does it quickly and without installing heavy software on every device. This guide is written for K-12 technology departments. It explains how DNS filtering works, how it compares to other kinds of content filtering, how to deploy it on and off campus, and what its limits are, so you can choose and configure a solution with realistic expectations.
How DNS Works, in Brief
Every time someone types a website name, their device asks a DNS resolver for the numeric address that goes with that name, the way you look up a phone number in a contact list. Only then can the device connect to the website. For more background, see what a domain name is and Internet Protocol explained.
A DNS filter is a resolver that checks the name against a list of categories and known-bad sites before answering. If the site is allowed, it returns the real address. If it is blocked, it returns nothing, or it sends the student to a “blocked” page.
Why K-12 Schools Use It
- It is fast and lightweight. The check happens before a connection is made, so there is little slowdown.
- It protects against threats. Filters can block known malware, phishing, and command-and-control sites, which helps against threats such as ransomware.
- It supports CIPA compliance. CIPA expects schools that receive certain federal funding to have internet safety policies and technology that blocks or filters harmful content. DNS filtering is one common part of meeting that.
- It covers every device on the network, including ones you cannot install software on, like printers, smart boards, and guest devices.
- It is simple to manage. You can set policy by category, by school, or by group, and make changes in minutes.
- It gives visibility. Logs show what is blocked and what is trending, which helps you spot problems early.
DNS Filtering vs. Content (URL) Filtering
The two are related but not the same, and many schools use both.
| DNS filtering | Content (URL) filtering | |
|---|---|---|
| What it checks | The domain name (for example, example.com) | The full web address and sometimes the page content |
| Where it works | At the DNS lookup, before connecting | In a proxy, firewall, or software on the device |
| Speed and effort | Fast and simple to deploy | Can be slower and more complex |
| Precision | Blocks whole domains | Can allow part of a site and block another |
| Encrypted (HTTPS) pages | Works without decrypting traffic | May need to inspect encrypted traffic to see details |
| Best for | Broad blocking, threats, every device on the network | Fine-grained rules, search and video controls, detailed reports |
A common design is DNS filtering as the broad first layer, plus a content filter or device-level filter for the finer rules and for devices that leave campus.
Step 1: Define Your Policy First
The technology follows the policy, not the other way around.
- Work with leadership and teachers. Decide what students at each grade level should and should not reach. Elementary, middle, and high school often need different rules.
- Write it down. Your acceptable use policy and your internet safety policy should match what the filter does.
- Decide on categories. Typical blocked categories include adult content, malware, phishing, and anonymizers or proxy sites. Others, like social media, games, or streaming, depend on your district’s choices and may differ by grade or by time of day.
- Plan for exceptions. Teachers will need to allow a specific site for a lesson. Decide who can approve it and how fast.
- Ask your counsel about legal requirements. CIPA and state laws can apply, and the details vary. Ask your district’s legal counsel and your funding program what is required.
Step 2: Choose a Solution
Options usually fall into a few groups:
- A cloud DNS filtering service. You point your network, and your devices, to the provider’s resolvers. It is quick to set up and manage, and it works off campus with the right agent or settings.
- A filter built into your firewall or security platform. This keeps everything in one place, though it may be tied to your network hardware.
- A device-level or browser-level filter. An agent or extension on the device that filters wherever the device is.
- A combination. Many districts use more than one layer.
Whatever you choose, compare these points:
- Does it filter off campus? Student devices go home. Ask how the solution protects them there.
- Does it support your devices? Chromebooks, iPads, Windows, and Macs all manage filters differently. See managing Chromebooks in K-12 schools and Mosyle MDM for K-12 schools.
- What do the logs include and how long are they kept? Think about reporting needs and privacy.
- How is student data handled? DNS logs can reveal browsing habits. Review the vendor’s privacy terms. See K-12 data privacy.
- How fast and reliable is it? If the filter goes down, can students still reach the internet, and what happens to their protection?
- How is it priced and licensed? Check what is included, and how the cost scales with students and devices. Prices and plans change, so confirm current terms directly.
- What support is there? Look for responsive support and clear documentation.
Popular K-12 Filtering Options
Three names come up in almost every K-12 conversation about web filtering: GoGuardian, Lightspeed Systems, and Securly. All three are built for schools, and all three do more than classic DNS filtering. They are usually cloud-based web filters that combine domain, category, and URL rules, run on and off campus, and add classroom or student-safety tools. Some offer a DNS-based option, some rely on an agent or browser extension on the device, and many offer both, so check which method each product uses in your setup. This is a general overview and not a recommendation, and products, bundles, and pricing change often.
| GoGuardian | Lightspeed Systems | Securly | |
|---|---|---|---|
| Known for | Web filtering plus classroom management and student-safety tools, popular with Chromebook districts | A broad school platform for filtering, classroom management, and device management | Web filtering with parent visibility and student wellbeing alerts |
| How it filters | Usually through an agent or extension on the device, which makes off-campus filtering straightforward | Cloud filtering with options for agents and for filtering on the network | Cloud filtering with agent, extension, and DNS-based options |
| Off campus | Designed to follow managed devices home | Designed to follow managed devices home | Designed to follow managed devices home |
| Extras to ask about | Classroom monitoring for teachers, and student safety alerts | Classroom tools, device management, and alerts | Parent portal and student wellbeing alerts |
| Good fit when | You are mostly Chromebooks and want filtering and classroom tools together | You want one vendor for several school technology needs | You want filtering with strong parent visibility |
Treat the table as a starting point for your own research. Features that I describe above can differ by plan, and vendors rename and repackage them.
How to Compare Them
- Pilot two products with real classrooms and compare how often good sites get blocked, how fast teachers can request changes, and how the devices perform.
- Ask exactly how filtering works on each device type you own: Chromebook, iPad, Mac, and Windows. Agent-based, extension-based, and DNS-based approaches behave differently.
- Ask about HTTPS and encrypted DNS. How does the product handle encrypted traffic, and how does it prevent bypass through VPNs and DNS over HTTPS?
- Ask about student safety features. Some tools scan student activity for signs of risk, which raises privacy and policy questions you should settle with leadership and counselors first.
- Review the data practices. Ask what data is collected, where it is stored, how long it is kept, and whether the vendor signs your state’s student data privacy agreement. See K-12 data privacy.
- Get the full cost. Compare what is included per student or per device, any extra modules, and renewal terms.
- Talk to peers. Ask neighboring districts what they use, what they like, and what they would change.
Some districts also use general-purpose DNS filtering services from network and security vendors, or the filtering built into their firewalls. These can be a good fit if you mostly need broad threat and category blocking on the school network, and you can add a device-level product for classroom features and off-campus coverage.
Step 3: Deploy It on Campus
- Document your current setup. Know where your DNS currently points.
- Point your network to the filter. Usually this means changing the DNS settings handed out by your DHCP server, firewall, or router. See networking devices explained.
- Set up locations or sites. Most services let you identify each school’s network so you can apply different policies.
- Start in a monitoring mode, if available, to see what would be blocked before you enforce it.
- Test with a pilot group. Check that learning tools, testing sites, and the library resources still work. See preparing school devices for testing.
- Roll out in stages. One school at a time is easier to support than the whole district at once.
Step 4: Cover Devices Off Campus
On a home network, the school’s DNS settings do not apply. To keep protection in place:
- Use a roaming agent or managed setting. Many services provide a small agent or a configuration that you can push to managed devices.
- Use your device management. Push the filter settings through your Chromebook or Apple management tool so students cannot remove them.
- Check that it follows CIPA and your policy at home. Decide whether the same rules apply at home, and tell families what to expect.
- Plan for privacy. Be clear with families about what is filtered and logged on a school device at home.
Step 5: Close the Common Workarounds
Students are creative, and a filter that is easy to bypass gives a false sense of safety. Common ways around DNS filters include:
- Changing the device’s DNS settings to a public resolver. Block outbound DNS from student networks to anything but your approved resolvers at the firewall, and lock down device network settings.
- Encrypted DNS in the browser (often called DNS over HTTPS). Browsers can send DNS lookups in a way that skips your filter. Use your browser and device policies to control or disable it, or point it to your own resolver.
- VPNs and proxies. Block known VPN and proxy categories, and block the ports and services they rely on where practical.
- Using the IP address directly instead of a name. A content filter or firewall rule can address that.
- Using a personal hotspot on a school device. Device management and off-campus filtering help here.
- Using search and video features that bypass domain-level rules. Use your filter’s safe search and restricted video options where they are available.
No filter is perfect. Combine technical controls with clear rules, supervision in classrooms, and digital citizenship lessons.
Step 6: Handle Over-Blocking and Requests
A filter that blocks too much frustrates teachers and gets bypassed, and one that blocks too little puts students at risk.
- Create a fast request process. A short form that goes to a person who can approve or deny a request, with a goal for turnaround time.
- Review the requests. If the same site keeps getting requested, change the policy.
- Use allow lists carefully. Add the narrowest rule that works, and review them regularly.
- Check false positives. Some legitimate educational sites share a domain with unwanted content.
- Tell teachers what to do when a site is blocked, and what not to do, such as using personal hotspots.
Step 7: Use Reports Wisely
- Review blocked threats such as malware and phishing attempts. A spike can signal an infected device.
- Watch for patterns such as many attempts to reach proxy sites, which can show workarounds.
- Limit who can see detailed logs. Browsing history is sensitive.
- Follow a retention policy. Keep logs only as long as you need them.
- Have a plan for concerning activity. Decide ahead of time who is told, and how, if the logs suggest a student may be at risk. Work with counselors and administrators on this, since it is a student wellbeing issue and not only a technical one.
Troubleshooting Quick Reference
| Problem | First things to check |
|---|---|
| A good site is blocked | Check the site’s category and your policy for that group. Allow it narrowly if appropriate. |
| A blocked site still loads | Check whether the device uses your DNS, or a public one or encrypted DNS, and whether it is on a VPN. |
| Filter not working off campus | Check the roaming agent or profile on the device, and whether it is enrolled in management. |
| Slow or failing lookups | Check that your resolvers are reachable and that your network settings are correct. Test from another network. |
| One school works and another doesn’t | Check that school’s location or site settings and its network DNS settings. |
| Everything is down | Check whether the filter service is reachable and what your network does if it is not. Have a documented failover plan. |
A 30-Day Starter Plan
- Week 1: Review your filtering policy with leadership and document your current DNS and filtering setup.
- Week 2: Choose or confirm your solution, and set up a pilot at one school in monitoring mode.
- Week 3: Review the pilot results, adjust categories, and build the request process.
- Week 4: Enforce at the pilot school, set up off-campus coverage, and close the main bypass paths.
Metrics Worth Tracking
- Percentage of student devices covered both on and off campus
- Number of malicious sites blocked, and any infected devices found
- Requests to unblock sites, and the time it takes to answer them
- Number of bypass attempts seen
- Filter uptime
Conclusion
DNS filtering is one of the most cost-effective layers a school can add: it is quick to deploy, covers every device on the network, and blocks a large share of unsafe and malicious sites. But it works best as one layer among several. Write the policy first, choose a solution that covers students off campus, close the common workarounds, make it easy for teachers to ask for changes, and handle logs with care. If your school or district needs help with network security, websites, or data, you can book a free consultation.
Laws, funding requirements, and product features change over time. Confirm CIPA and state requirements with your district’s legal counsel, and check current vendor documentation before you configure your own filter.
More on school technology: ransomware attacks on K-12 schools and managing Chromebooks in K-12 schools.