
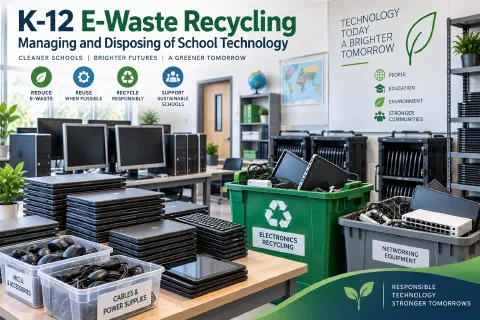
K-12 e-waste recycling means retiring old school technology in a planned way: inventory every device, wipe or destroy its data, follow your district’s surplus rules, hand the equipment to a certified recycler or a reuse program, and keep records that prove it was done.
Every school ends up with a closet, a cart, or a storage room full of devices nobody knows what to do with: Chromebooks past their update date, old laptops, projectors, printers, tablets, and a few servers. It is tempting to leave them there. But old devices still hold student data, they contain materials that should not go into a landfill, and they take up space that someone is paying for. This guide is written for K-12 technology departments and covers how to manage the full end of a device’s life, from the first decision to retire it to the final certificate of recycling.
Why E-Waste Matters for Schools
- Student data stays on old devices. A device that is thrown away or sold without being wiped can expose student records, saved passwords, and files. See K-12 data privacy for the laws that apply to that data.
- Electronics contain materials that need careful handling. Batteries, screens, and circuit boards can contain hazardous materials, and many places have rules about how they must be disposed of.
- Reuse and recycling save resources. Recovering metals and parts reduces the need for new materials, and extending a device’s life reduces waste.
- Stored equipment costs money. Storage space, insurance, and staff time all add up, and unmanaged old devices are easy to lose track of.
- Schools are accountable. As public institutions, districts usually have to follow rules for disposing of public property, and a clear process protects you in an audit.
Step 1: Decide When a Device Reaches the End of Its Life
Retirement should be a decision, not an accident. Common triggers:
- The device passed its update expiration date. Chromebooks stop receiving updates on a set date, which makes them a security risk and often unsupported for testing. See managing Chromebooks in K-12 schools and preparing school devices for testing.
- It is broken beyond a sensible repair cost. Set a rule, such as repairing only when the cost is well below the cost of a replacement.
- It no longer meets requirements. Slow hardware, weak batteries, or devices that cannot run required software.
- It is surplus. Extra equipment from a closed program or a school consolidation.
Use your asset records to plan retirements in batches, usually at the end of the school year, instead of one device at a time.
Step 2: Know Your Inventory
You cannot dispose of what you have not counted.
- Keep an asset list with the asset tag, serial number, model, location, assigned user, purchase date, and warranty or update expiration date.
- Reconcile it with your management console. Compare the list with the devices in your Google Admin Console or other management tool, and find devices that are missing, unmanaged, or listed twice.
- Record each disposal. For every device that leaves, note the date, how it was disposed of, who approved it, and who received it.
- Find the forgotten devices. Check storage rooms, teacher closets, and old carts. Devices that are not on the list are exactly the ones that end up in a dumpster.
Step 3: Follow Your District’s Surplus Rules
Public school equipment is public property. Before you give away, sell, or discard anything, check the rules.
- Check board policy and procurement rules. Many districts need board approval or a formal surplus declaration before they dispose of equipment. Ask your business office.
- Check state and local law. Rules about selling or donating public property, and about handling electronic waste, vary by state and sometimes by city or county. Ask the district’s legal counsel or business office what applies to you.
- Check grant and funding conditions. Equipment bought with certain grants or programs can have rules about how long you must keep it or how you can dispose of it.
- Get approvals in writing, and keep them with the disposal record.
Step 4: Protect the Data
This is the most important step for a school. A recycler is not a substitute for wiping data.
Match the Method to the Device
Data sanitization guidance, such as the NIST 800-88 guidelines, describes three levels: clear (overwrite or reset), purge (a stronger method that makes recovery infeasible even with lab techniques), and destroy (physical destruction). Choose the level based on how sensitive the data is and what will happen to the device next.
- Chromebooks. Most user data is in the cloud, and the device holds little locally. A factory reset (Powerwash) clears the local data. If the device is leaving the district, also remove it from your Admin Console, either by deprovisioning it or by following your management tool’s current retirement steps, so that it is not still tied to your domain. Check Google’s current documentation for the steps.
- Windows and Mac laptops. Use a tested wiping tool or the encryption-based approach your tools support, and verify the result. A simple “delete” or a quick format is not enough.
- Servers, storage, and copiers. Servers, network storage, and many multifunction copiers and printers contain drives that hold documents. Treat them like computers, and do not forget them.
- Phones and tablets. Remove accounts, remove them from management, and reset them to factory settings.
- Damaged or failed drives. If a drive cannot be wiped, destroy it physically, or use a recycler that provides documented drive destruction.
Good Habits
- Encrypt drives from day one. Encryption makes wiping faster and safer, because deleting the key can make the data unreadable.
- Wipe before the device leaves the building whenever you can, rather than trusting the recycler to do it.
- Verify a sample. Check that wiped devices really are clean before they go out.
- Keep devices secure until pickup. Store them in a locked room, and keep a list of what is in it.
- Remove asset tags and school labels if the devices are going to be reused outside the district, unless your rules say to leave them.
Step 5: Choose Where the Equipment Goes
Not everything has to be recycled. In order of preference, many schools consider:
- Reuse inside the district. Older but working devices can serve for kiosks, library catalogs, labs, spare parts, or low-demand roles. A device that is no longer supported for testing or security-sensitive work may still be fine for offline use. If the device runs an operating system that no longer receives updates, keep it off sensitive networks.
- Donation or resale, where your rules allow. Some districts donate to nonprofits or sell surplus through an approved process or auction. Make sure the data is wiped, the recipient is allowed under your policy, and the transfer is recorded.
- Manufacturer or retailer take-back. Some manufacturers and stores accept old equipment, and some programs offer credits toward new equipment.
- Certified recycling. For everything else, use a recycler that follows recognized standards. Look for certifications such as R2 or e-Stewards, which cover environmental and data security practices, and check that the certification is current.
Be careful with “free” removal offers. A recycler that does not document what it does with your equipment, or that exports it without controls, can leave you holding the risk.
Step 6: Vet the Recycler
Ask questions before you hand over the equipment.
- Are you certified (R2, e-Stewards), and can you show me the current certificate?
- Where does the equipment go, and what happens to it at each stage? Do you send anything overseas, and under what controls?
- How do you handle data? Do you wipe or destroy drives, and do you provide a certificate for each batch, with serial numbers if needed?
- Do you offer secure pickup and a documented chain of custody?
- What insurance do you carry?
- What does it cost, or what is the credit, and what is not accepted?
Put the answers in a written agreement, and ask for a certificate of recycling or destruction after each pickup. File it with the disposal record.
Step 7: Handle Batteries and Special Items Safely
- Lithium-ion batteries in laptops, Chromebooks, and tablets can be a fire hazard if damaged or stored badly. Store them in a cool, dry place and do not stack damaged devices. Ask your recycler how to handle swollen or damaged batteries.
- Screens, projectors, and CRTs may contain materials that require special handling. Check with your recycler.
- Do not put electronics in regular trash or dumpsters. In many places, including California, rules treat many electronic devices as waste that needs special handling. Check your local rules.
- Keep the paperwork for any hazardous or universal waste handled by your district.
Step 8: Plan Ahead to Create Less E-Waste
The easiest e-waste to manage is the waste you never create.
- Buy for durability and repair. Look at battery life, repairable parts, warranties, and the update expiration date before you purchase.
- Plan a refresh cycle. Replacing devices on a schedule spreads the cost and avoids large piles of old equipment all at once.
- Repair what is worth repairing, and keep a small stock of parts such as chargers, keyboards, and batteries.
- Extend the life of devices where it is safe. Reassign working devices to lower-risk jobs before retiring them.
- Reuse chargers and accessories where they are compatible, and recycle them with the device.
- Include disposal costs in your budget, especially for large refreshes.
Step 9: Involve Students and the Community
E-waste is a good teaching topic. Many schools run electronics collection days for staff and families, student-led recycling projects, or lessons on the life cycle of devices and where electronics come from. If you collect devices from the community, remind people to wipe their own data first and be clear about what you accept.
A Simple Retirement Checklist
- Confirm the device is on the retirement list and approved under your surplus rules.
- Remove it from your management console and any other system.
- Wipe or destroy the data and record the method.
- Remove or update asset tags as your policy requires.
- Store the device securely until pickup.
- Hand it to an approved recipient or certified recycler.
- Get the certificate and file it with the record.
- Update the asset list and the management console.
Metrics Worth Tracking
- Number of devices retired per year and how many were reused, donated, or recycled
- Percentage of devices wiped and verified before leaving
- Percentage of disposals with a certificate on file
- Devices found in storage that were not in the inventory
- Cost or credit per device disposed
Conclusion
Good e-waste management protects student data, follows the rules for public property, and keeps old equipment from piling up. Keep an accurate inventory, wipe or destroy data before anything leaves, use certified recyclers, and keep the records. A district that handles the end of a device’s life as carefully as the beginning is safer and spends less. If your school or district needs help with technology planning, security, or data, you can book a free consultation.
Laws, certifications, and recycling programs vary by location and change over time. Check current rules with your district’s business office, legal counsel, and your state or local environmental agency before you set your own process.
More on school technology: managing Chromebooks in K-12 schools and ransomware attacks on K-12 schools.