
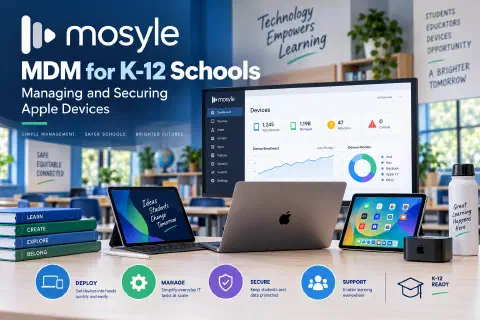
Mosyle is a mobile device management (MDM) platform built for Apple devices, and K-12 IT teams use it to enroll iPads and Macs automatically, apply security and restriction policies, deploy apps and updates, and lock, locate, or wipe a device remotely, all from one web console.
Many schools run iPads in the lower grades and Macs in labs, classrooms, and staff offices. Managing those by hand does not scale, since a single iPad cart can hold thirty devices, and every one needs the right apps, settings, and restrictions before a student touches it. This guide is written for K-12 technology departments. It explains how Mosyle fits into Apple’s school ecosystem, how to set it up, and how to run it day to day. It is a practical overview, not a product manual, and it applies to other Apple MDM tools too.
What an MDM Does for a School
An MDM is the central tool that tells devices how to behave. For a school, that means:
- Enrollment. Devices join your organization automatically and securely.
- Configuration. Wi-Fi, accounts, restrictions, and settings are pushed to devices, not typed in by hand.
- App management. Apps are installed, updated, and removed centrally.
- Security. Passcodes, encryption, and restrictions are enforced, and lost devices can be locked.
- Inventory and reporting. You can see what devices you have, who has them, and what is installed.
- Support. Many problems can be fixed remotely without touching the device.
Without an MDM, an iPad is just a personal device. With one, it is a managed school device.
How Mosyle Fits with Apple’s School Tools
Mosyle does not work alone. It relies on Apple’s own school services, and understanding the pieces makes setup much easier.
- Apple School Manager (ASM). Apple’s web portal for schools. It holds your device purchases, creates and manages student and staff accounts (Managed Apple Accounts), and links your MDM to your devices and app licenses.
- Automated Device Enrollment. Devices bought through Apple or an authorized reseller can be assigned to your MDM in Apple School Manager. When a device is turned on and connected to the internet, it enrolls itself and gets your settings, with no technician needed.
- Apps and Books (volume purchasing). You buy app licenses through Apple School Manager and distribute them through your MDM.
- Supervision. A supervised device gives the MDM stronger controls than a personal device. Schools generally want their devices supervised.
- Classroom tools. Apple offers classroom management tools for teachers. Check which ones work with your MDM and setup.
Mosyle also offers its own education products, and plans, features, and pricing change over time. Check Mosyle’s current site for what is included and for any free or education options, instead of relying on an old quote.
Step 1: Plan Before You Enroll
A little planning saves a lot of rework.
- Decide who uses what. Shared classroom iPads, 1:1 take-home devices, staff Macs, and lab computers each need different settings.
- Choose how accounts will work. Decide how students and staff sign in and how accounts are created, for example by syncing from your directory or Google Workspace, or by importing a roster. Check the current integration options.
- Plan your group structure. Mosyle lets you organize devices and users into groups, with policies applied by group. Start simple, for example by school, grade band, and staff, and add only when needed.
- Read your privacy obligations. Student data laws apply to the apps and settings you choose. See K-12 data privacy.
- Count licenses and devices. Make sure your licensing matches your device count, including spares.
Step 2: Connect Mosyle and Apple School Manager
- Set up Apple School Manager and confirm your organization’s details with Apple.
- Link your MDM server in Apple School Manager so that new device purchases can be assigned to Mosyle.
- Connect app licensing so that purchased apps appear in Mosyle for distribution.
- Test with a pilot device before assigning a whole purchase. Make sure it enrolls, receives the right profile, and installs the right apps.
Screens and menu names change, so follow the current instructions from Apple and Mosyle.
Step 3: Enroll Devices
- Use automated enrollment for new devices. Ask your reseller to register devices in your Apple School Manager account when you buy them, and assign them to Mosyle there.
- Enroll existing devices that were not bought through that process. Depending on the device, you may be able to add it to Apple School Manager through Apple Configurator or a similar process. Check Apple’s current options, since this has changed over time.
- Make enrollment mandatory where you can, so students cannot remove management.
- Label and track each device. Match the serial number with an asset tag and record where the device goes.
- Enroll in stages. Do a pilot, then one school, then the district.
Step 4: Apply Security Policies
Security for student devices is mostly about restricting what can go wrong and keeping the device recoverable.
- Passcodes. Set passcode rules for staff devices and older students. Younger students often use simpler methods, so choose what fits the age group.
- Restrictions. Control the camera, the app store, installing apps, account changes, AirDrop, and other features based on grade level.
- Content filtering. CIPA requires schools that receive certain federal funding to filter content. Use a filter that works on and off campus, and confirm that it works with Apple devices and with your MDM.
- Wi-Fi and network settings. Push the school network settings so devices connect without passwords being shared. See networking devices explained.
- Encryption. Confirm that device encryption is on, and on Macs, manage disk encryption and recovery keys with your MDM.
- Lost Mode and Activation Lock. Know how to locate, lock, and disable a lost or stolen device, and how Activation Lock works with a managed device so that you do not end up with unusable devices when they are retired. See K-12 e-waste recycling.
- Staff accounts. Protect administrator and teacher accounts with multi-factor authentication. See two-factor authentication explained.
- Limit data exposure. Review which apps collect student data and what they are allowed to access.
Test every change on a pilot group first. A restriction that blocks a testing app on the first day of the state test is a long day.
Step 5: Deploy and Manage Apps
- Build a core app set that every student or grade level needs, and push it automatically.
- Use groups to deliver the right apps to the right devices, so a kindergarten iPad does not get middle school tools.
- Vet apps before approval. Check the privacy policy, the data they collect, and whether they meet your district’s requirements. A vetting process also gives teachers a way to ask for new apps.
- Offer a self-service catalog where it makes sense, so teachers and staff can install approved apps without a ticket.
- Keep apps updated. Set updates to install automatically unless you have a reason to hold a version.
- Remove what you no longer need. Old apps are old risks.
Step 6: Manage Updates
- Update on a schedule. Operating system updates fix security problems, so plan them instead of ignoring them.
- Test before rolling out. Try a new major version on a pilot group before the whole district.
- Avoid updates during testing windows. See preparing school devices for testing.
- Check hardware compatibility. Older iPads and Macs eventually stop receiving new versions. Track the support status of each model and plan for replacement.
- Check storage and battery. Devices that are almost full may fail to update.
Step 7: Day-to-Day Remote Management
One of the biggest benefits of MDM is fixing things without touching the device.
- Push a setting or app to one device or a whole group.
- Restart, lock, or locate a device.
- Clear a passcode or reset a device when a student forgets it, following your policy.
- Wipe and reassign a device for a new student at the end of the year.
- Review reports to find devices that have not checked in, are out of date, or are missing required apps.
- Document common fixes. A short knowledge base helps staff and cuts repeat tickets.
Troubleshooting Quick Reference
| Problem | First things to check |
|---|---|
| Device won’t enroll | Is it assigned to your MDM in Apple School Manager? Is it connected to the internet during setup? Check the serial number and the MDM server link. |
| App won’t install | Is there a license available? Is the app assigned to the right group? Is the device connected and has enough storage? |
| Settings aren’t applying | Check the device group, the profile assignment, and when the device last checked in. Restart it. |
| Student can’t sign in | Check the account status and sign-in method. Check that the account is in the right group and for typos before resetting. |
| Device is locked or disabled | Check whether it was locked as lost, whether a passcode was forgotten, or whether Activation Lock is on. |
| Many devices fail at once | Suspect a recent policy change, an expired certificate or token, or a network issue. Roll back the change on a pilot group first. |
| Device hasn’t checked in | Check that it is powered on and connected to Wi-Fi, and that its management profile has not been removed. |
Keep an eye on certificates and tokens that connect your MDM to Apple. When one expires, devices can stop enrolling or updating, and the problem looks like a wider failure.
A 30-Day Starter Plan
- Week 1: Set up or review Apple School Manager, connect it to Mosyle, and choose your groups.
- Week 2: Enroll a pilot group and test profiles, restrictions, and app installs.
- Week 3: Build the core app set, the security policies, and the update plan.
- Week 4: Roll out to one school, collect feedback, fix issues, and write your help desk guide.
Metrics Worth Tracking
- Percentage of devices enrolled and supervised
- Devices that have not checked in recently
- Devices on an out-of-date operating system
- Tickets per week and the most common categories
- Time to get a replacement device to a student
- Percentage of staff accounts with multi-factor authentication
Conclusion
An MDM turns a pile of iPads and Macs into a fleet you can actually manage. Mosyle, like other Apple MDM tools, works best when you pair it with Apple School Manager, keep your groups simple, test changes on a pilot group, and document your fixes. Start with automated enrollment, a solid security baseline, and a clean app set, and a small team can support thousands of devices. If your district needs help with device management, security, or data, you can book a free consultation.
Product features, plans, pricing, and menu names change often. Check the current documentation from Apple and Mosyle before you configure your own environment. I am not affiliated with either company.
More on school technology: managing Chromebooks in K-12 schools and ransomware attacks on K-12 schools.