
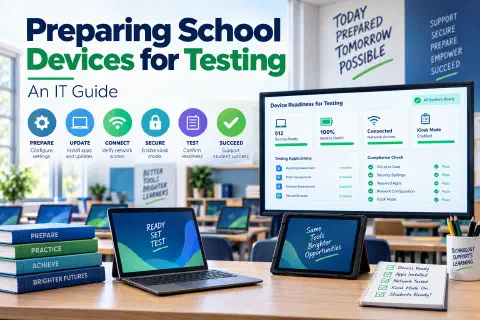
Preparing school devices for online testing means confirming that every device meets the testing program’s requirements, installing the secure testing browser, updating devices and freezing risky changes, checking that the network can handle a full room of students, and running a practice session well before the first test day.
For California schools, that usually means the CAASPP (California Assessment of Student Performance and Progress) and the ELPAC (English Language Proficiency Assessments for California). Other states have their own tests, but the IT work is very similar. A test day is not the time to learn that a device cannot load the test, that Wi-Fi drops with 30 students connected, or that an update restarted a laptop in the middle of a section. This guide is for K-12 technology departments and walks through the preparation, from the first checklist to the day-of support plan.
Know Who Does What
Testing works best when IT and the school’s testing staff each know their part.
- District and school test coordinators manage the schedule, student rosters, test settings, and training for test administrators.
- IT owns the devices, network, accounts, secure browser installation, and technical support during testing.
- Test administrators (usually teachers) run the sessions and report problems.
Meet with the coordinator early in the year and get the testing windows, the grade levels and number of students per session, the rooms, and the number of devices needed at once. Everything else in your plan comes from those numbers.
Step 1: Check the Technical Requirements
Every testing program publishes technical requirements for operating systems, browsers, and devices. Do not rely on last year’s notes.
- Read the current technical guide for the test (for CAASPP and ELPAC, the guides published by the state testing program and its contractor). Requirements change from year to year.
- Check your device models and operating systems against the supported list, including the operating system versions.
- Check device age. Older Chromebooks that have passed their update expiration date may no longer be supported for testing. See managing Chromebooks in K-12 schools for how to track those dates.
- Plan the numbers. Count how many working devices you will need at the same time per session, plus spares.
Step 2: Install and Test the Secure Browser
Online tests run inside a locked-down secure browser (or a secure testing app on Chromebooks) that keeps students from opening other tabs or apps during the test.
- Deploy it centrally. On managed Chromebooks, the secure testing app is normally pushed from the Google Admin Console to the right organizational units. Computers use an installer that you push with your management tool.
- Use the right version. Install the version the testing program requires for this year, not an older one.
- Keep it available to the testing group only. Many districts put testing devices in a separate organizational unit so test settings do not affect everyday classroom use.
- Check sign-in. Confirm that the testing app works with the way students will sign in (for example, a guest or kiosk session versus a student account).
- Run the practice or training test. Programs usually provide a practice test and a way to check that a device is ready. Run it on every device model you plan to use.
Menu names and installation steps vary, so follow the program’s current instructions.
Step 3: Update Devices Before Testing, Then Pause Changes
Updates are good, but the timing matters.
- Update early. Install operating system and browser updates a few weeks before the test window, then restart every device.
- Freeze changes during testing. Avoid new policies, new extensions, and big updates during the window, since each is a chance for something unexpected to happen.
- Check storage and battery health. Devices low on storage may fail to install updates or the testing app.
- Charge everything. Plan charging carts and check batteries. Batteries that last through a normal class day may not last through a long test session.
If you manage Chromebooks, test settings changes on a small group of devices first, and write down what you changed so it can be reversed.
Step 4: Prepare the Network
A room of students loading the same test at once is one of the heaviest loads your network sees all year.
- Check Wi-Fi coverage and capacity in each testing room, including access point count, signal, and the number of devices each access point can handle. See networking devices explained for what each device does.
- Allow the testing domains. Add the testing program’s required domains and ports to your firewall and content filter allow lists. The technical guide lists them, and the list can change from year to year.
- Review filtering and security tools. Content filters, proxies, and endpoint tools can block or slow test traffic. Test with the filter on, as students will be.
- Consider caching. Some programs support a local caching option that reduces the load on your internet connection when many students start at once. Check whether your testing program offers it.
- Test with real load. A single device connecting says little. Run the practice test in a room with a whole class using it at once.
- Know your backup plan. If the network fails, know what the coordinator can do. For example, rescheduling a session, moving to another room, or using a mobile hotspot where the program allows it.
Step 5: Set Up Accounts and Security Settings
- Confirm student and staff accounts are active, in the right organizational units, and correctly rostered in the testing system.
- Restrict what runs during the test. The secure browser handles most of this, but make sure your policies do not conflict with it, such as extensions that try to inject content or tools that record the screen.
- Protect test security. Test content is confidential. Staff should not photograph or copy it, and devices should not be left unattended with an open test.
- Protect student data. Testing systems hold sensitive student information. See K-12 data privacy and two-factor authentication for staff accounts that can access results and rosters.
- Check accessibility tools. Some students use designated supports or accommodations, such as text-to-speech, screen magnification, or assistive hardware. Confirm that those tools work with the secure browser before test day.
Step 6: Run a Dry Run
A dry run catches most problems while there is still time to fix them.
- Pick one room per school, with a full class of devices.
- Have a teacher run a practice session exactly as the real one will run.
- Record every failure: devices that will not load, slow screens, sign-in problems, and audio problems for tests that use audio.
- Fix the causes, then repeat it until the room runs cleanly.
Step 7: Build a Day-of Support Plan
On test days, IT’s job is to respond quickly and quietly.
- Staff the hours. Assign technicians to schools or floors. Do not rely on a single ticket queue.
- Keep a ready stack. Charged, tested, enrolled spare devices and chargers that can be swapped in seconds.
- Use a simple escalation path. The test administrator calls IT, IT fixes or swaps the device, and the coordinator decides about the session and any test-security reporting.
- Do not troubleshoot in front of students unless needed. Swap the device, then fix it later.
- Know what to report. Technical interruptions often need to be documented for the coordinator. Check the program’s current rules for how to handle them.
Troubleshooting Quick Reference
| Problem | First things to check |
|---|---|
| Secure browser won’t open | Confirm the right version is installed and the device is in the correct organizational unit. Restart the device. |
| Test is slow or won’t load | Check Wi-Fi in that room, then the filter and firewall allow lists. Confirm whether other rooms have the same issue. |
| Device restarts or freezes during a test | Check battery and charge level, storage, and any pending updates. Swap the device. |
| Student can’t sign in | Check the account status, roster, and the sign-in method. Check for typos and caps lock before resetting anything. |
| Audio doesn’t work | Check the volume, the headphones, and the browser’s audio permission. Test audio on the practice test first. |
| Accessibility tool not working | Confirm the tool is supported by the secure browser and enabled for that student in the testing system. |
| Many devices fail at once | Suspect the network, a recent policy change, or an allow list that was missed. Tell the coordinator right away. |
A Four-Week Countdown
- Four weeks before: Read the technical guide, count devices, check update expiration, and meet with the test coordinator.
- Three weeks before: Update devices, deploy the secure browser, and set up the testing organizational unit.
- Two weeks before: Update the network allow lists, check the Wi-Fi in each testing room, and run a dry run.
- One week before: Fix what the dry run found, freeze policy changes, charge devices, and confirm the support schedule.
- Test week: Staff the support plan, log every issue, and review what happened afterward to improve next year’s plan.
Conclusion
Testing goes smoothly when IT prepares the way a good teacher prepares a lesson: know the requirements, test the tools early, practice with a real class, and have a plan for when something goes wrong. Keep a checklist from year to year and update it after each testing window. If your school or district needs help with the technology behind education, you can book a free consultation.
Testing requirements, secure browser names, domains, and rules change each year. Always use the current technical documentation from your state testing program before you configure anything.
More on school technology: managing Chromebooks in K-12 schools and K-12 data privacy.