This article will focus on the step-by-step instructions on how to install Ubuntu. First of all, here is an intro to the popular Debian-based Operating system. Ubuntu Linux is one of the most popular free operating systems in the world. Mainly, thanks to the great community behind this project and to Canonical, the company in charge of this operating system. Throughout the years, Ubuntu has been working to become the gateway into the Linux world simplifying the installation process.
Until a few years ago, the Linux operating system was used mainly used by professionals as a server OS. Consequently, it was not considered suitable for the common user. In the last decades, the community behind this alternative open-source OS focus on creating a user-friendly platform. Therefore, creating an alternative to proprietary operating systems like Windows and macOS.
Where can find Ubuntu?
The first step on how to install Ubuntu Linux consist of visiting the Ubuntu website and downloading the ISO file. This website offers a variety of downloads depending on your needs. Here is a list of all the different options and flavors of the Operating system.
- Ubuntu Desktop A desktop Operating System replacement that you can install on any computer whether it’s Windows or macOS.
- Ubuntu Server Whether you want to configure a simple file server for your house or build an enterprise server solution for a company.
- IoT Devices This is a developers edition for those who want to try snappy Ubuntu Core?
- Raspberry Pi If you want to run Ubuntu on your Raspberry Pi single-board computer just pick the OS image you want, flash it onto a microSD card, load it onto your Raspberry Pi, and away you go.
- Other Flavors Ubuntu flavors offer a wide variety of desktop environments each with their own choice of default applications and settings.
I just downloaded Ubuntu, now what?
All Linux operating systems offer a couple of options that allow you to try the OS before installing it on a computer. This can be accomplished by running the Linux OS directly from either a USB stick or a DVD. This is a quick and easy way to experience how the operating system looks like. Most importantly, it doesn’t alter your computer’s configuration in any way, and a simple restart without the USB stick or DVD is all that’s needed to restore your machine to its previous state.
Another way to run the Ubuntu OS is by installing it on a virtual machine. A virtual machine allows you to run an entire operating system inside another operating system without touching your current OS. You can accomplish this by downloading and installing VirtualBox. The free and open-source software creates a virtual computer inside your computer consequently allowing you to run two operating systems at the same time.
How to install Ubuntu
1. How to create a bootable Ubuntu Linux USB drive
First of all, what is a bootable Ubuntu USB stick? With a bootable USB stick you can
- Install or upgrade Ubuntu
- Test out the Ubuntu desktop experience without touching your PC configuration
- Boot into Ubuntu on a borrowed machine or from an internet cafe
- Use tools installed by default on the USB stick to repair or fix a broken configuration
Once you have downloaded Ubuntu’s ISO file, the next step is to create a bootable USB stick. It allows you to boot your computer into the Ubuntu OS to try it or to install Ubuntu operating system. Here is a list of some of the most popular free tools used to create live USB drives.
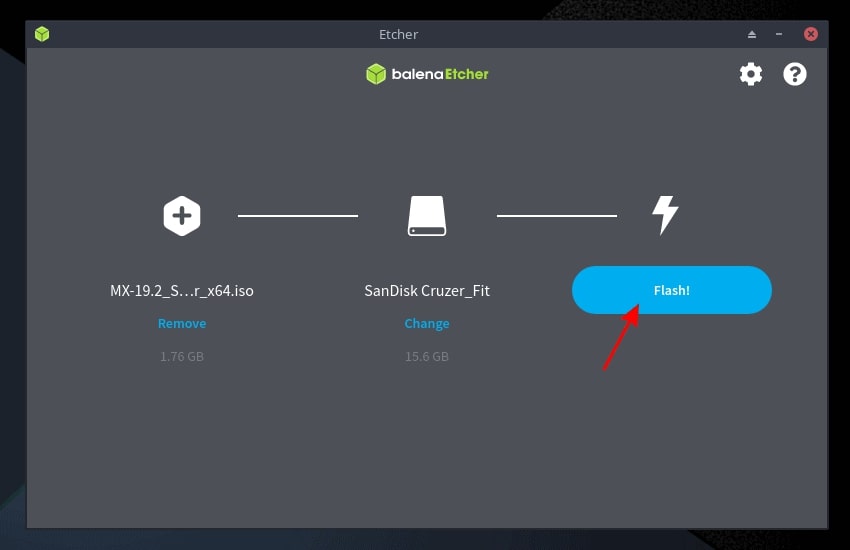
After downloading and installing one of the Bootable USB Creator tools. Insert a blank USB drive into your computer. Then follow the simple USB Creator tool to create your bootable USB drive. This is as simple as selecting the blank USB drive. Choosing the desire ISO file and clicking the create or Flash button.
You need at least an 8 GB USB drive to install Ubuntu
2. How to boot from a bootable Ubuntu Linux USB drive
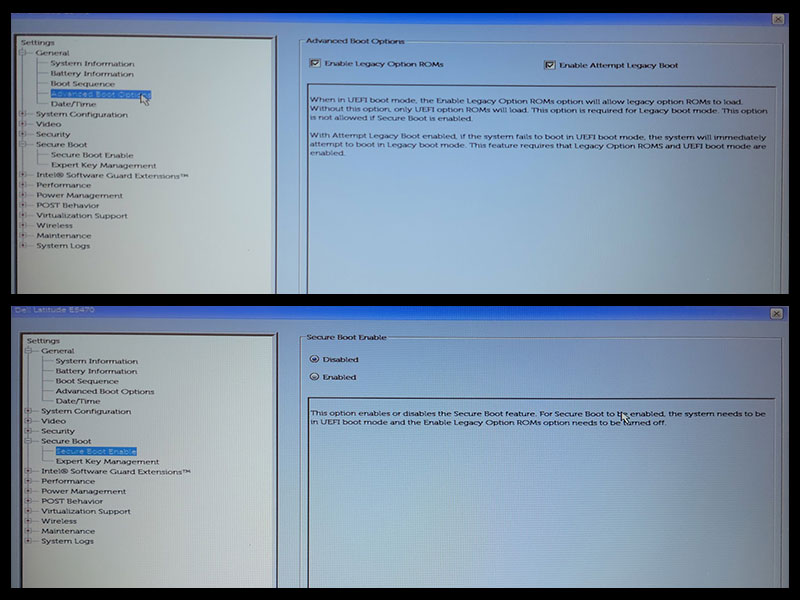
When you’re troubleshooting your computer or installing a new operating system, you may need to access your BIOS menu to boot from a USB drive. Unfortunately, every computer manufacturer has a slightly different way to access that bootable options. Here’s a relatively common way to boot a computer from a USB drive:
Note: The following instructions is based on a Dell computer.
- Restart your computer
- Insert your Bootable USB drive
- Press the F2 key to enter System Setup when the Dell logo appears. The requested function key could vary depending on your computer brand.
- On the side, panel click on Advanced Boot Options and then Click to check on Enable Attempt Legacy Boot
- Click on Secure Boot Enable and then Disable Secure Boot Enable
- Make sure to make the booting from USB the first option by going into the Boot Sequence menu
- Save your new settings and restart your computer
3. Installing Ubuntu Linux
Finally, the first screen you will see is the GRUB screen the program used for loading and managing the boot process. In other words, this is known as a boot loader, the software that prepares the operating system when the computer is turned on.
- For a basic installation select the first option called Ubuntu.

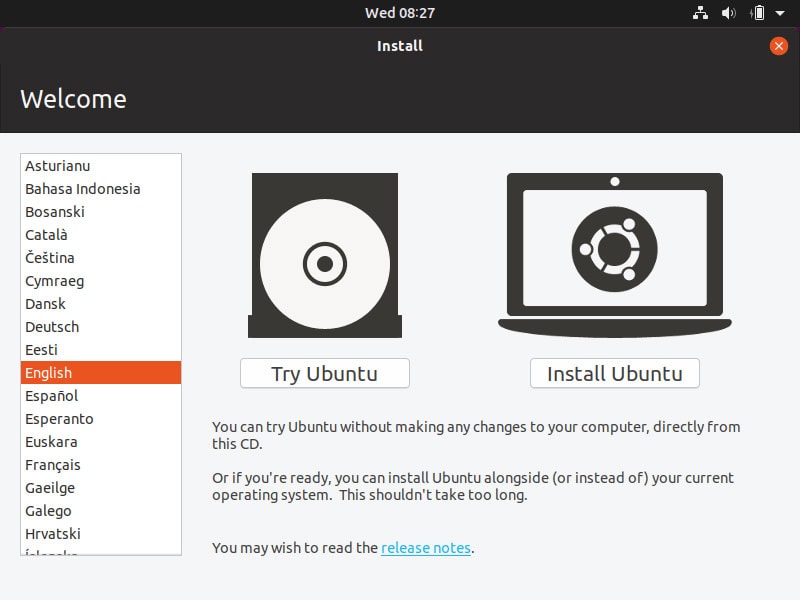
4. The Ubuntu Installation Welcome Screen
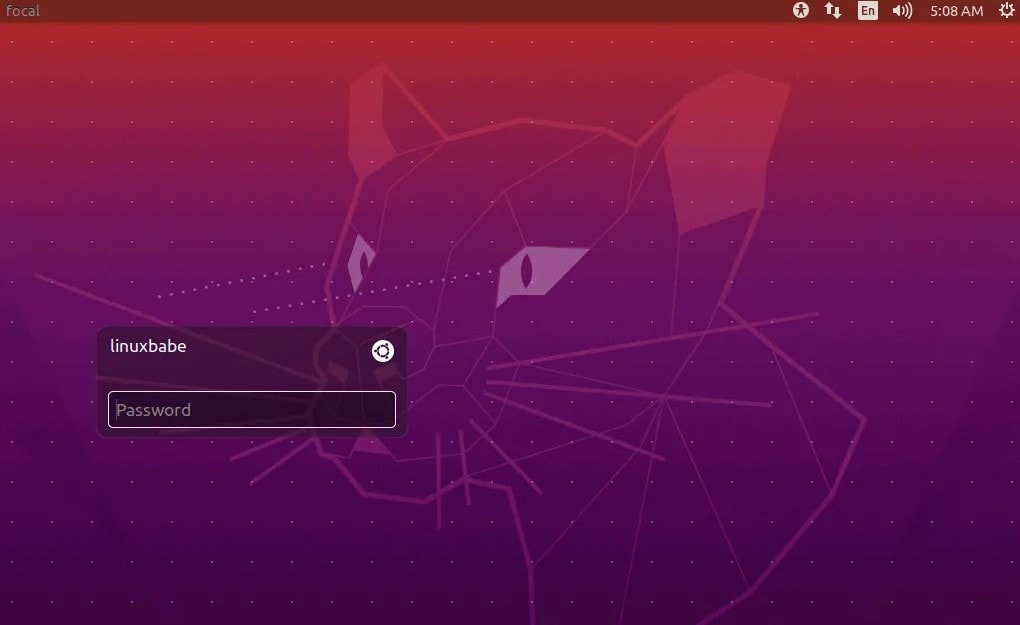
The Ubuntu welcome screen will be the next screen in your ubuntu installation. On this screen, you get to choose whether you want to “Try Ubuntu” or “Install Ubuntu” and your preferred language. By clicking on the Try Ubuntu button you’ll get to test the system before installing it on your computer.
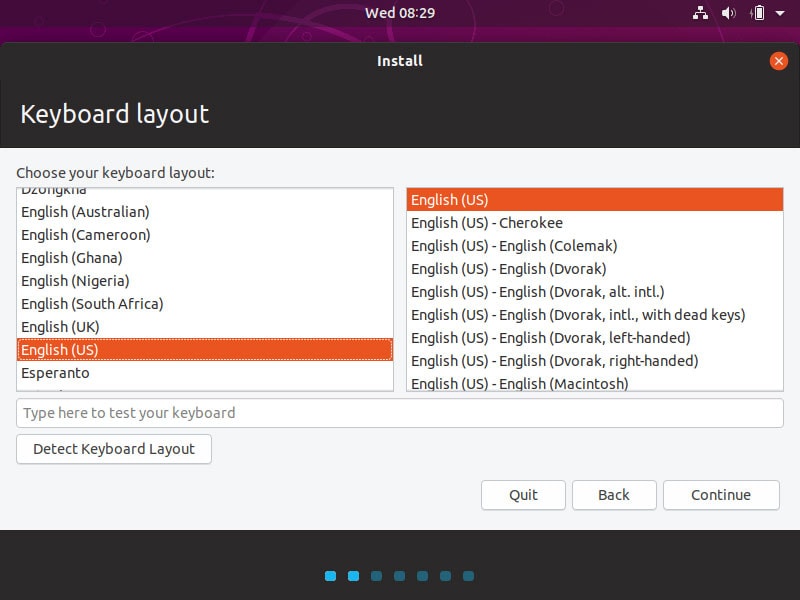
5. Choose Your System Keyboard Layout
On this screen, you’ll be able to choose your preferred keyboard layout. Most of the time you will just use the default options. Therefore, just click the Continue button.
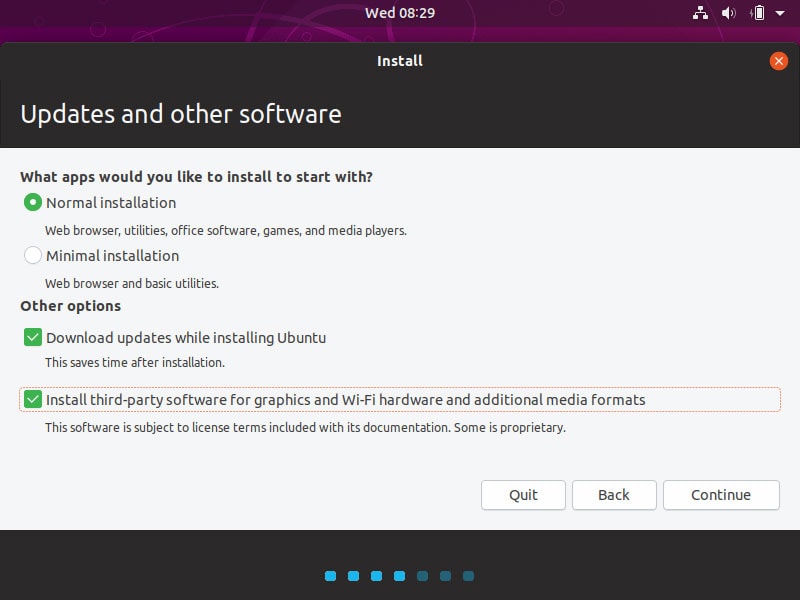
6. Updates and Other software Screen
The updates and other software screen will give you the option between the Normal installation or a Minimal installation. The normal installation install the complete version of Ubuntu that includes games, web browser, media players, office software, and other utilities. On the other hand, the minimal installation only includes basic utilities and a web browser. This last one is the best option for older devices.
For better results and minimize the compatibility issues please make sure to check both of the Other Options.
- Download Updates while installing Ubuntu
- Install third-party software for graphics and Wi-Fi hardware and additional media formats
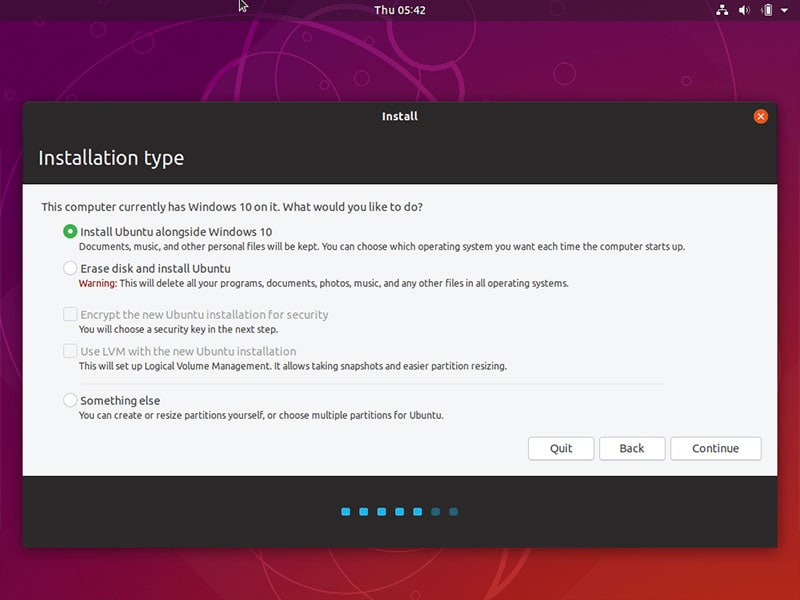
7. Ubuntu Installation Type
The Ubuntu installation type screen provides you with three important installation options. Make sure you think about your options before clicking the Continue button.
- Install Ubuntu alongside Windows – Select this option if you want to have a version of Windows on this computer and want to keep both operating systems. If you select this version, the GRUB menu will allow you to choose which operating system you want to boot the computer.
- Erase disk and install Ubuntu – This option will delete all data in this computer and replace it with a new Ubuntu installation.
- Something else – In this option, you will be able to create or resize your hard drive partitions before installing the new operating system.
After you choose one of the three options. A new screen will present you with default options to continue with the installation.
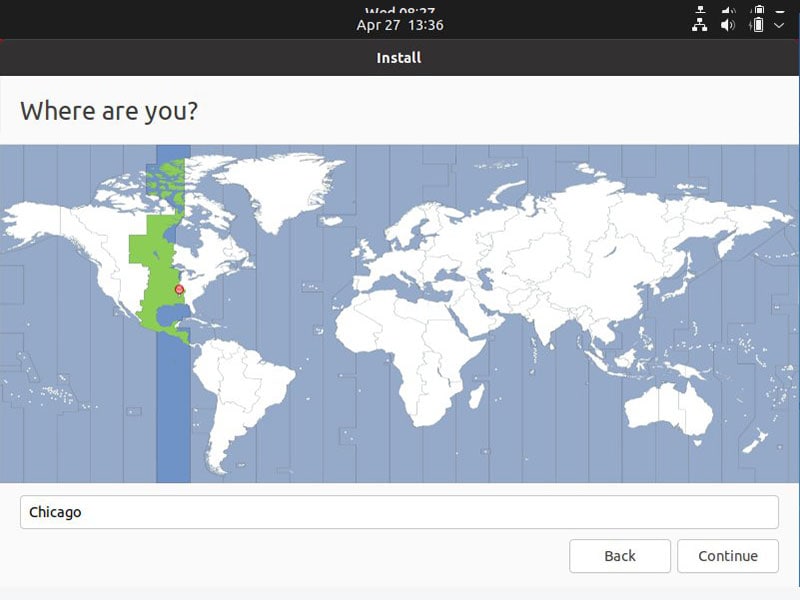
8. Select Your Location
On this screen is where you choose your time zone. Type a city name you live in and click Continue.
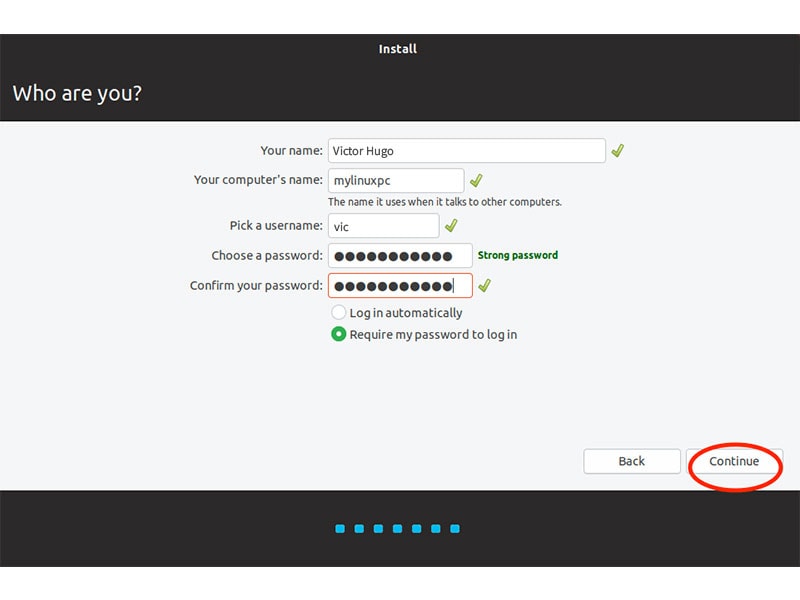
9. Ubuntu Device Name and Password
The next screen is where you type the first user account and create a name for the computer.
- Type your first name and last name
- Then type your computer’s name or device name
- Type the login username
- Make sure to type a secure password and select your login options
The Bottom Line
In conclusion, the entire Ubuntu installation process might take from 15 min to 30 min. Please make sure you back up all your files before installing a new operating system. There are many interesting Linux distributions out there, so why not try some of them. All installation processes are usually quite similar. If you do not know which one to chose, it is never wrong to pic the default Ubuntu version to get started.

Victor Hugo Solis
Master’s Degree in Information Security, a Bachelor’s Degree in Database Administration, and experience as a WordPress Web Designer & Developer.