WooCommerce is one of the most popular eCommerce solutions on the internet. This eCommerce platform offers almost all of the functionality you need to sell products online. Here is the simple guide on Adding Products in WooCommerce or your online store.
Most likely, what you’ll want to do now is start adding products to your store. Before adding your first product to your store, let’s get familiar with how product categories, tags, and attributes work.
Adding products to WooCommerce
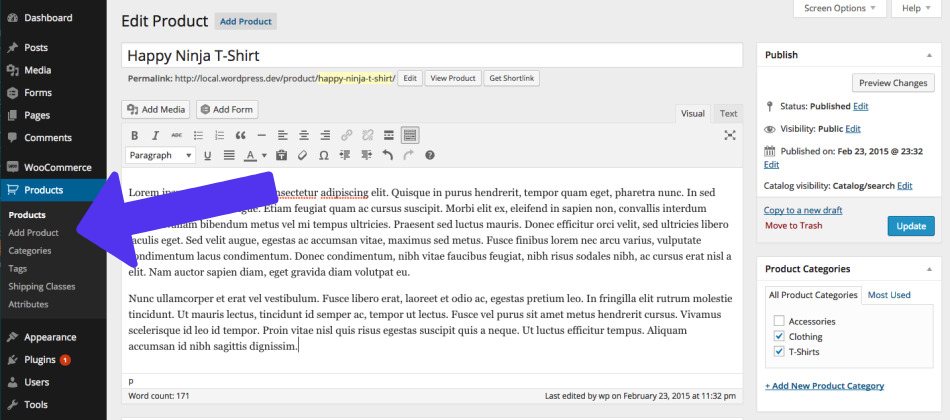
Adding a Simple product into your store is very similar to writing a new post in WordPress.
- Go to Products > Add Product. On this screen you need to enter all the information describing your product.
- In the Product Name field, you’ll enter the product Title. *Make sure you enter a descriptive.
- In the Description, box enter the complete product description.
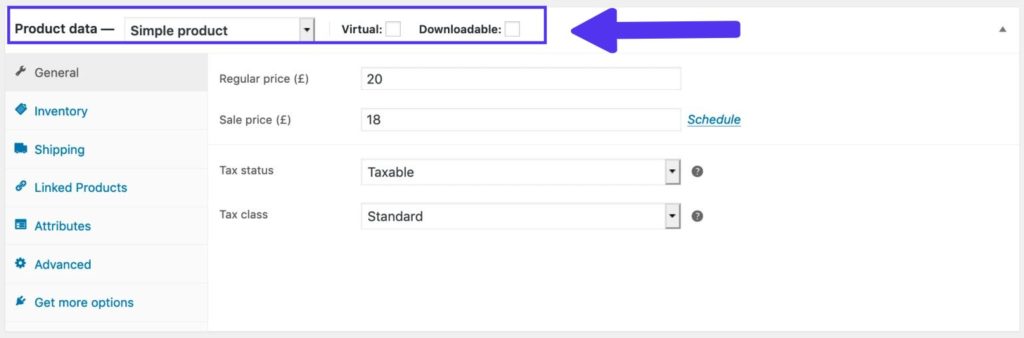
Type of Product You are Creating
- Go to the Product Data panel, and select
- Simple Product (Single product)
- Variable Product (Product with multiple colors or sizes).
- Grouped Product (A collection of related products).
- Affiliate Product (Product sold outside your website).
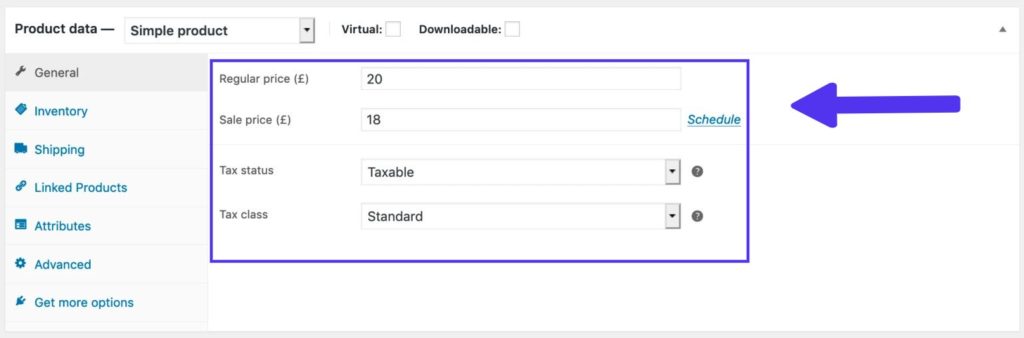
Product Price
General section
- Price Section
- Regular Price – Enter the item’s regular price
- Sale Price – Enter the item’s discounted price. Only if applicable
- Product Tax Section
- Tax status – Taxable / Shipping only / None
- Tax class – Select which tax class should be applied
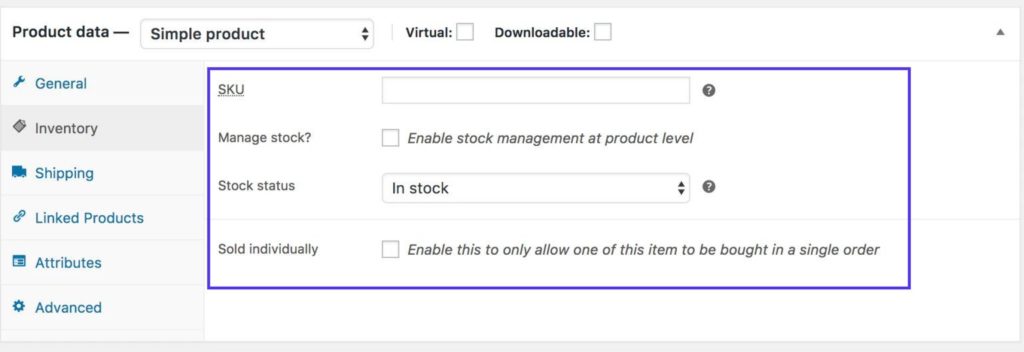
Inventory section
The inventory section of the product allows you to manage the stock quantity of the product. Additionally, this section allows you to select if your customers can backorders this product.
Most noteworthy, make sure you Enable Stock Management in the Products Inventory Settings. Consequently, only the ‘Stock status’ option is visible in the Product Data Inventory box.
When the stock management at the product level is disabled. You are responsible for manually updating the Stock Status.
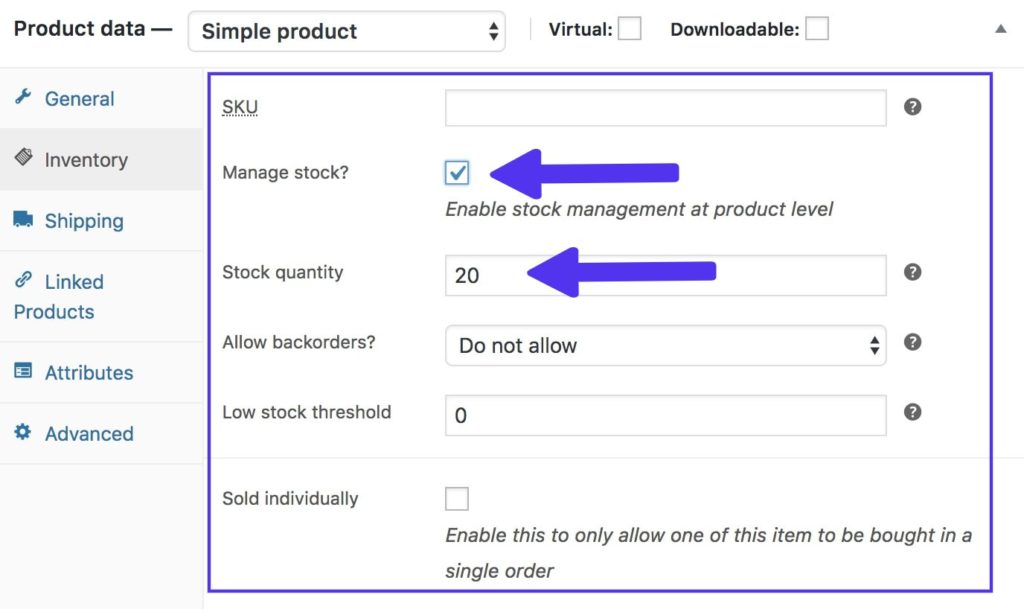
When the Enable stock management at product level option is selected. Then the following options will show up.
- When you enter the Stock Quantity WooCommerce will auto-updates Stock Status as Stock, Out of Stock or On Backorder.
- Secondly, select whether to Allow Backorders.
- Low stock threshold – Enter an inventory number in which you want to be notified.
- Check the Sold Individually box to limit the product to one per order.
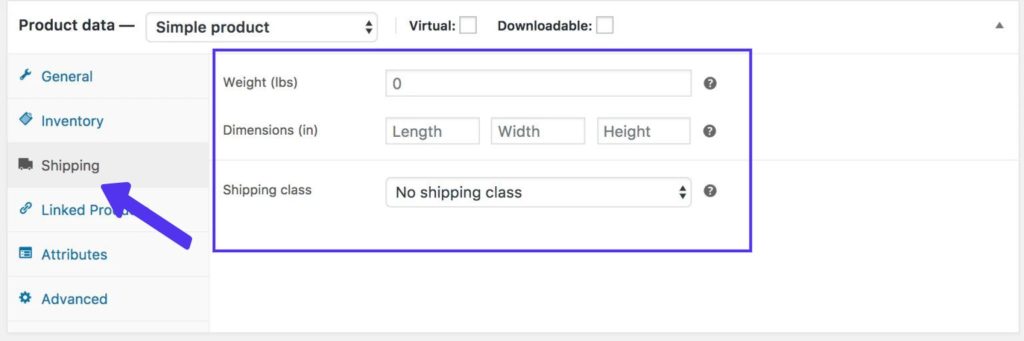
Shipping section
- Weight – Enter the Weight of the item.
- Dimensions – Enter the Length, width, and height for the item.
- Shipping Class – Enter the shipping classes.
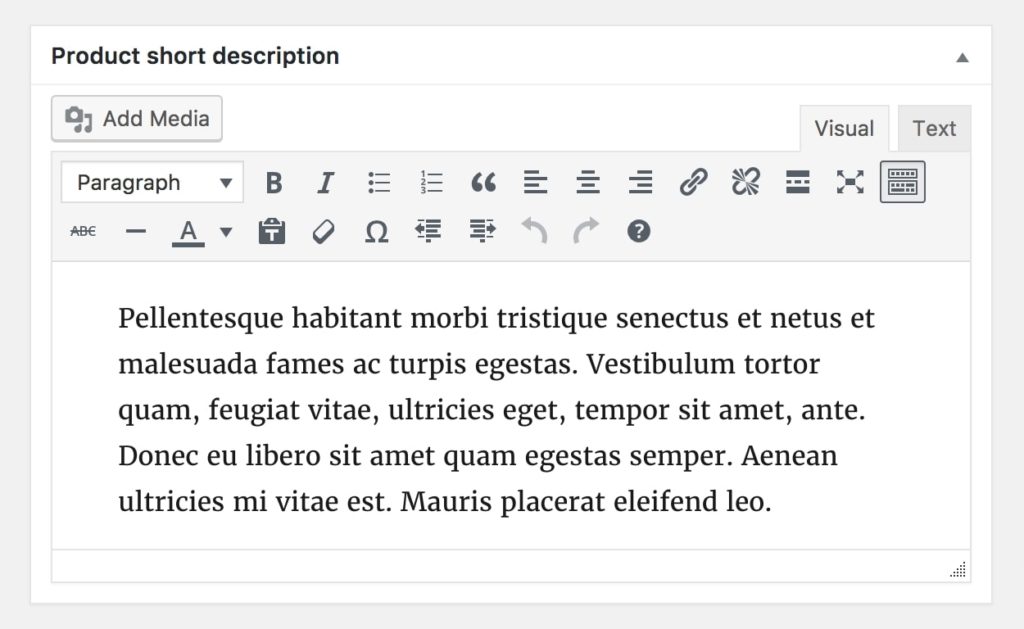
Product short description
The product short description is the description that appears next to the product image.
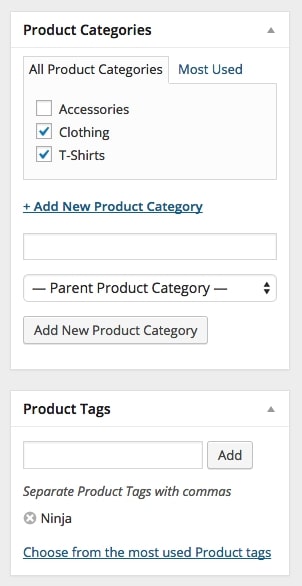
Product Taxonomies
Enter the product category of your product on the right-hand side of your Product panel.
- Product Category – This category allows the customer to grouped items from the same category.
- Product Tags – are the smaller classification options that are usually used to distinguish products within a category.
Adding Product Images and Galleries
Enter the product image of your product on the right-hand side of your Product panel.
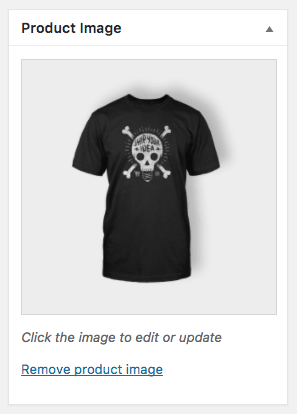
- Single Product Image is the largest image and refers to the main/featured image on your individual product details page.
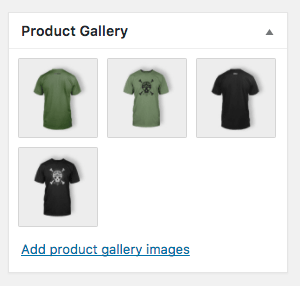
- Product Image Gallery are the medium-sized images appearing in product loops, such as the Shop page, Product Category pages, Related Products, Up-sells, and Cross-sells.
- Product thumbnails are the smallest images used in the Cart, Widgets, and (optional) Gallery thumbnails underneath the Single Product Image.
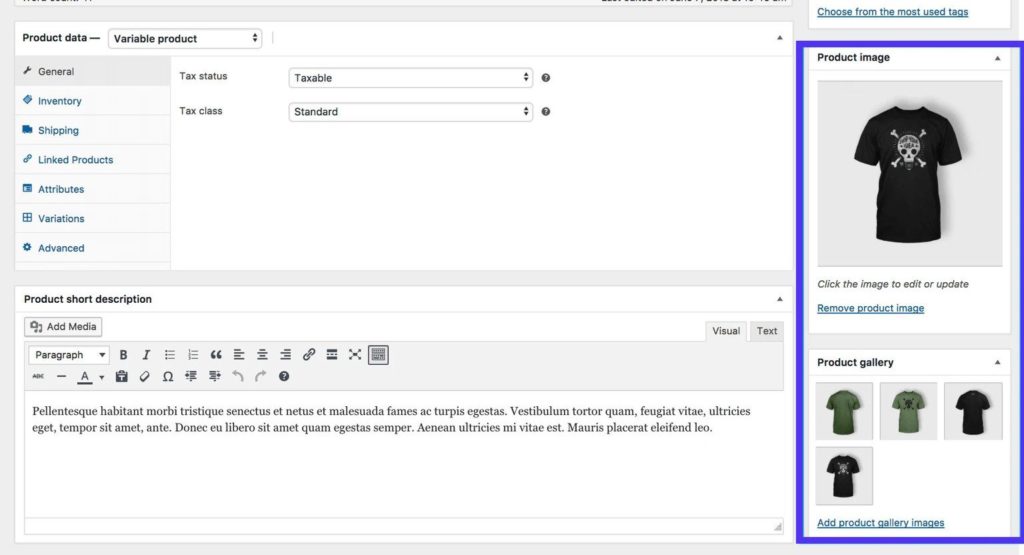
Product image
Adding an image to your product
The Product Image is the main image for your product and is reused in different sizes across your store.
- Select Set Product Image.
Product Galleries
Add multiple images to your Product
Product galleries display all images attached to a product through the Product Gallery meta box.
Create a Product Gallery using the same method as adding a Product Image, but using the Product Gallery meta box.
The Bottom Line
Your product images serve as your ambassadors to your brand. Not only on your product page but across your store and beyond on your on- and offline marketing channels. A great image will help you nurture your buyers along their decision-making journey and, naturally, do a better job of converting your visitor into a customer.
This is why post this post called Adding Products in WooCommerce to make it easier to add your images into your new online store.

Victor Hugo Solis
Master’s Degree in Information Security, a Bachelor’s Degree in Database Administration, and experience as a WordPress Web Designer & Developer.